
Keep the tissues handy throughout Starz’s Outlander season five episode 11, “Journeycake,” an episode that puts us through the emotional wringer over and over again. Episode 11 starts off with Jamie (Sam Heughan), Claire (Caitriona Balfe), Roger (Richard Rankin), and Brianna (Sophie Skelton) returning to Fraser’s Ridge, wagon loaded down with supplies. Among them are ingredients Claire is determined to use to introduce Jemmy to the joys of peanut butter and jelly sandwiches. Their calm ride on a beautiful fall day is disturbed by the sight of a burned-out cabin, littered with dead bodies.
Jamie quickly assesses the situation and figures out the people inside were killed prior to the fire that destroyed their house. They find one body with an arrow stuck in it, but Jamie doesn’t immediately jump to the conclusion Indians are responsible.
They call out for any survivors in the nearby woods. No one responds.
Roger, still inside the cabin, finds one of the victims is still clinging to life. The victim’s barely hanging on and the body’s so horribly burned there’s no chance of recovery. Roger comforts the young woman and then gently covers her mouth while Jamie recites the Death Dirge (a Gaelic prayer) as she passes.
After burying the dead, the Frasers continue their journey home.
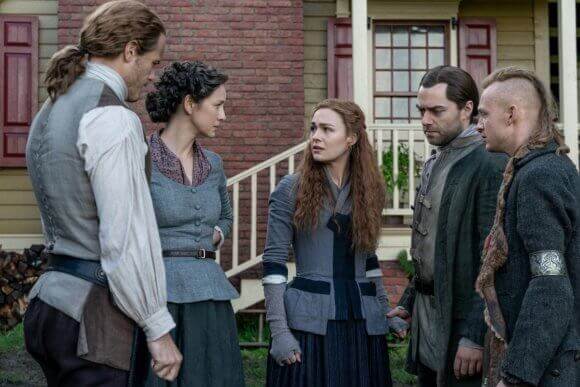
Safely back at Fraser’s Ridge, Ian (John Bell) is having a blast entertaining Jemmy while Claire and Brianna reminisce about the peanut butter and jelly sandwiches Brianna made her mom for traveling through the stones. Their chat’s broken up when Jemmy calls out in pain after touching the opal on Claire’s necklace. He claims it’s hot but Ian has no idea what he’s talking about. Brianna touches it and also feels heat.
Jemmy grabs the stone from his mom and it suddenly cracks open. Now even Roger’s paying attention and he had been busy working with wood. Claire begins to hear humming and so does Jemmy. It’s so loud he places his little hands over his ears. Did we just confirm Jemmy can hear the stones?!
Brianna, Roger, and Claire can still feel the heat generated by the rock. However, Jamie and Ian can’t. Roger, surprised, says, “He can travel!” Time-traveling abilities = confirmed.
Claire and Jamie’s expressions are a mixture of sadness, shock, and confusion. But Jamie’s the first to put how they’re feeling into words. “Will you?” he asks. No one replies.
They’ll have to think about it later as a group of men arrive on horseback. The group’s led by Mr. Brown and he explains he’s come asking for help. He believes they need to keep the county safe and has formed a vigilante group, not sanctioned by the government. However, the new Governor is aware of what Mr. Brown’s doing.
When Brown asks if Jamie knows of any cabins being burned down, Jamie tells him about the one they came across a few days prior. Brown’s men believe Indians must have done it, but Ian is positive they’re wrong.
One of the Browns has a bad leg injury and Claire sees to it. She asks after the little baby girl they left in his niece’s care and is told she’s doing fine.
Before they leave, Mr. Brown asks if Jamie and Roger will form a group to help out. Jamie declines, for now, saying he has much to do at Fraser’s Ridge. Mr. Brown reminds him he answered the call when Jamie needed men, but Jamie believes that was different. That was war, this is fighting crime.
Mr. Brown advises Jamie to think on it.
After they take off, there’s finally a quiet moment for Claire and Jamie to speak alone. Claire thinks her daughter will leave because she promised Roger that if Jemmy can hear the stones, they would return to their time.
So much for quiet time as Ian arrives to discuss the opal. Mohawk legend says Otter Tooth’s ghost appears to the one who has the opal. The person with the opal can see the future, and Ian reveals the Mohawk asked about Claire after she left. Ian has put all the clues together and has questions. (Of course he does!) He reveals he possesses a journal of Otter Tooth’s in Latin but doesn’t know what it says.
Jamie begins reading the journal and it’s obvious Otter Tooth was a time traveler. He spoke of not belonging to any one time and not knowing when he was because the Mohawks didn’t measure time by a scale he understood.
Jamie passes the journal to Claire and she’s shocked to see he wrote with a ballpoint pen, something that confuses Ian when she mentions it. Ian asks, “Who…or what…are you?”
Claire takes a seat and explains she comes from 200 years in the future. Ian thinks she’s a fairy (which would be very cool), but Claire shoots that theory down. Ian realizes it’s not just Claire; it’s also Roger and Brianna. Ian’s shocked Jamie kept the secret to himself and Jamie confesses he did so because it’s very difficult to understand. Ian wonders if Murtagh knew and Jamie acknowledges that he did.
Jamie closes the door and Ian takes a seat. This is going to take a while to fully explain!
Jamie and Claire meet with Ulysses (Colin McFarlane) who’s gone into hiding after killing Jocasta’s despicable lawyer, Gerald Forbes. He’s fine but bored and Claire hands over food while Jamie passes him a book to help fill the time.
Claire and Jamie are both grateful Ulysses saved Jocasta’s life. Still, he’s considered a murderer and Jamie warns him to watch for Mr. Brown’s crime-fighting group. Ulysses assures them that even though he’ll never be pardoned, he would step in and save Mistress Cameron again if needed.
Jamie advises Ulysses to leave North Carolina and head to Philadelphia because of his slave status. Ulysses corrects him, explaining Jocasta signed documents to make him a free man years ago when Mr. Cameron died. He chose not to leave.
Over at Roger and Brianna’s place, Jemmy’s finally fallen asleep. Roger wonders why the opal broke when Jemmy held it but didn’t break when other time travelers held it. Brianna thinks it could be that Jemmy’s extra-sensitive since both his parents are travelers. She believes it could be further proof Jemmy’s Roger’s child.
Roger just wants his family to be safe. They don’t need the opal to travel because he has the rubies and the gem Bonnet gave Brianna. Roger’s worried about Jemmy’s health and safety if they stay here, and Brianna agrees. They just need to come up with a clever story to explain why they’re leaving Fraser’s Ridge. She wants them to be able to say goodbye to everyone before they go poof.
They come up with the idea to say they’re going to Boston where Roger has just accepted a job as a college professor. They plan to leave within the month.
Lord John Grey (David Berry) pays a visit to Fraser’s Ridge and is happy to learn Bonnet was tried and sentenced to death. The reason behind his visit emerges – he’s there to say goodbye. He needs to return to England and Hellwater because Lord Dunsay has died. The estate is now William’s.
Lord John confesses he’s grown fond of farming and such, and he regrets having to leave. But, he needs to teach William how to be an Earl. However, Lord John assures Jamie they’ll return to Virginia sometime in the future. “I can’t imagine William never seeing you again,” says Lord John.
Lord John admits to being worried about the unrest in the colonies. He hands Jamie a portrait of William and says, “The older he gets, the more he looks like his father.”
Now that Ian’s in the know, he’s sad to hear Brianna, Roger, and Jemmy are leaving. Brianna warns him a war is coming and Ian jokes you don’t need to be whatever she is to figure that out. He wonders if she considered staying to change things. She thinks what’s coming is a lot bigger than them.
Claire’s nearby washing clothes and Ian, stuck on this idea of altering the future, asks her about the Battle of Culloden. Claire concedes they saved some men from Lallybroch but weren’t able to change the outcome of the battle itself.
Ian finally gets to what’s eating at him. He wants to travel through the stones to fix what happened between him and his wife. Claire has to tell him it won’t work because you need to be born with the ability to travel. The opal didn’t feel hot to him nor did he hear the humming.
Ian continues begging Claire to take him with her. Again, she has to tell him she can’t. He becomes upset but won’t explain what happened with his wife.
Later that evening as Jamie relaxes and reads by the fire, Claire reveals she’s asked Brianna to draw portraits – something she and Jamie can remember them by. Jamie reminds her he remembered her for 20 years without any pictures, but the portraits will help.
Claire applies perfume and looks lovingly at Jamie as he reads. Shortly thereafter we see the two in bed and Claire’s uncomfortable and sweating. She leaves their bed and opens the window for fresh air. Jamie rises to check on her and delivers sweet kisses, noting her skin is salty. She confesses she’s hot and smelly, and Jamie ticks down the list of what he smells as he breathes in her scent.
Jamie apologizes for falling asleep before they could make love, noting he smells her special perfume and knows she wanted him. He makes up for that error by fully satisfying his beautiful wife.
The following day Jamie visits Claire in her office where she’s using a microscope equipped with a new lens, courtesy of Lord John. Jamie peers through the microscope and seems quite amused by the “germs” with funny little tails. Claire corrects him, pointing out they’re not germs – those are sperm he’s admiring!
Claire explains what a sperm is – Jamie knows them as “seeds” – and he immediately wants to know who they belong to. When she assures him they’re his, he’s taken aback. “How did you get them?!” he asks, confused. Claire reminds him she woke up in custody of some from last night’s bedroom activities.
Brianna’s eating breakfast when a nervous Jamie hands her a portrait. Brianna has no idea who the young man is in the painting and Jamie informs her it’s her brother. Jamie explains the circumstances leading up to William’s birth, assuring Brianna that Claire knows all about his son. He doesn’t want to talk about William’s mother but does because Brianna has a right to know. He makes sure she understands their relationship wasn’t about love.
Brianna wants to meet William and Jamie explains he’s in London now and doesn’t know he’s his father. William’s full title is now the 9th Earl of Ellesmere. But if anyone learns the truth, he would no longer be the Earl. Brianna finally understands who Lord John’s son actually is and she’s happy to learn she has a brother.
(Time to grab the tissues!)
Jamie thinks Brianna should look for William in books since he’s an Earl and should be noteworthy. Suddenly sad, he asks when she plans on leaving. Brianna confirms they plan to leave in a week. He confesses that when Claire left, pregnant, to travel through the stones he always knew he was a husband and father to their child…and now he’s a grandfather. “Even though I may never see any of you again, you have made my life whole,” says Jamie.
He kisses his gorgeous daughter’s hand.
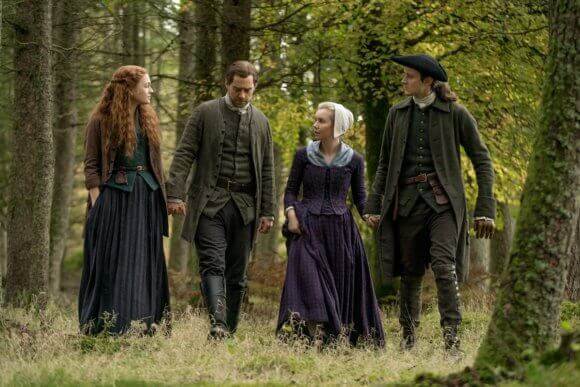
Brianna and Roger take a leisurely walk with Marsali (Lauren Lyle) and Fergus (César Domboy) through the woods. They break the news they’re leaving, and Fergus can’t believe they’re going to Boston – it’s so far away. Marsali wonders what she’ll do without Brianna, confessing Brianna’s become like a sister to her. Brianna replies, “Leaving everyone is going to be the hardest thing I’ve ever done.”
Roger assures them they’ll miss them as Brianna and Marsali hug.
Later, a conflicted Claire watches as Brianna continues with her goodbyes.
Lionel Brown returns to learn Jamie’s decision about participating in the Committee of Safety. Jamie politely declines the invitation. He needs to serve his family but wishes the Browns the best of luck.
Mr. Brown isn’t happy to learn Jamie’s decision. Still, he asks if Claire can look at his wife’s injured arm. Claire does and assesses it as a broken wrist. Mrs. Brown won’t explain how her wrist was injured but Claire doesn’t shy away from all but flat-out accusing Mr. Brown of hurting his wife. When she sends him out to get tonic for the pain, Mrs. Brown finally opens up. She admits her husband gets angry when she doesn’t do the chores. Mrs. Brown makes the excuse that her husband is sad and drinks since their daughter left.
Mrs. Brown admits her husband hurt her when she wouldn’t have intercourse.
Mr. Brown returns and as Claire’s finishing up splinting Mrs. Brown’s broken wrist, Mr. Brown notices the “Dr. D Rawlings” engraving. He doesn’t mention it but quickly makes his wife leave Claire’s office.
Roger and Ian have a moment alone and Roger asks Ian for a big favor. He wants Ian to accompany them to the stones to bring home the horses. They don’t want Jamie or Claire to do it, and Roger admits that’s because Brianna’s afraid she’ll change her mind if her parents are there.
Ian agrees to go with them. Roger then hands Ian a paper, explaining it’s for everything Ian’s done to help them. Ian unfolds it and it’s the deed to Roger’s land. Ian can’t accept it, but Roger asks he just look after it for him – and do with it what he will. Roger truly hopes Ian can find happiness.
Brianna and Lord John are the next to exchange goodbyes. Brianna confesses she knows about William and Lord John’s glad to hear she knows the truth. He reveals both William and Brianna are just like Jamie in many ways. He’s sorry he won’t be able to tell William about her, but she understands.
Lord John shares the good news that he’s taking Ulysses with him to London. Once he steps foot in England, he’ll be truly free. He admits it was Jamie’s idea.
Brianna calls Lord John a wonderful father, adding, “My brother’s lucky to have you in his life, and so am I.”
And finally, with 10 minutes left in the episode, Brianna and Claire have their moment together. They hold each other tightly but we aren’t privy to any verbal exchange.
Next, we see the family seated for what could be their final supper together. Claire’s made peanut butter and jelly sandwiches which Jamie eats with a fork. Ian chows down using his hands and Jamie jokes that he could use it to mend his boots.
Jamie rises to make a toast and everyone follows his lead. Jamie says, “To home…to family…great health. Slàinte mhath.” They all raise their glasses and drink.
The following day Ian accompanies Roger, Brianna, and Jemmy to the stones. It’s a long journey and once there, Jemmy seems to feel their pull. They climb the hill and trek through the woods to stand in front of the stones. The humming is incessant as Claire picks up Jemmy and comforts him.
Two weeks pass and Jamie finds Claire in Brianna’s old house, looking through her drawings. She admits it feels as though they’ve been gone forever. Claire’s incredibly sad as Jamie reveals this should be the day Brianna and Roger reach the stone circle.
A melancholy Claire notes it’s just her and Jamie again. Jamie assures her, “We’re not alone, Sassenach.”
They hug and touch foreheads before Claire and Jamie look through Brianna’s drawings once again. Jamie hopes Brianna will follow her dream and be an engineer.
Back at the stones, Brianna, Roger, and Jemmy prepare to time travel. They’ve tied a rope tight around their waists, binding them together with Jemmy firmly between them in Brianna’s arms. Brianna thanks Ian one final time, tells him she loves him, and asks that he take care of her parents.
They each hold a gem and with one final look back at Ian they touch the stone and step through time.
Ian approaches the stone immediately after they disappear, touches it, and nothing happens.
They travel through the stones and wake sprawled out on the ground. Jemmy’s the first to rise. He runs off, exclaiming happily about something he sees. Roger and Briana get to their feet and are shocked by what they see. Roger says, “What the devil?!”
Back at Fraser’s Ridge, Jamie, Fergus, and the men are digging privies when they hear an explosion. The noise is coming from the direction of the still!
Claire rushes outside but Jamie tells her to stay put and keep looking after her patients. He heads out with the men toward the still and doesn’t realize it’s a trap. Mr. Brown’s men rush in and attack Claire and Marsali, and Claire’s patient is stabbed. Marsali’s knocked out and falls hard on her stomach.
Claire’s screaming for her life as they place a hood over her head and take her away.
The men return and are surprised to see Fergus’ young son by himself in the yard. Fergus asks about Marsali and the boy says she won’t wake up. The boy whispers in Fergus’ ear, “The bad man took grandmama.”
Jamie and Fergus rush into the house and thankfully Marsali is still breathing. Jamie screams out for Claire and there’s no reply.
The final scene of the episode is of Jamie running over his land, torch in hand. He lights the fiery cross, a signal to his men that the time to fight has arrived.
- Sam Heughan Teases Outlander Season 5 at Wizard World New Orleans
- Outlander Season 5: Caitriona Balfe on Aging Claire and American History
- Outlander Season 4 Finale Recap
- Outlander Season 5 Episode 1 “The Fiery Cross” Recap
- Outlander Season 5 Episode 2 “Between Two Fires” Recap
- Outlander Season 5 Episode 3 “Free Will” Recap
- Outlander Season 5 Episode 4 “Company We Keep” Preview
- Outlander Season 5 Episode 5 “Perpetual Adoration” Recap
- Outlander Season 5 Episode 6 “Better to Marry Than Burn” Recap
- Outlander Season 5 Episode 7 “The Ballad of Roger Mac” Recap
- Outlander Season 5 Episode 8 “Famous Last Words” Recap
- Outlander Season 5 Episode 9 “Monster and Heroes” Recap
- Outlander Season 5 Episode 10 “Mercy Shall Follow Me” Recap
- Outlander Season 5 Episode 12 “Never My Love” Recap


